


")


When you export a VM, a complete copy of the VM (including disk images) is stored as a single file on your local machine, with a .xva file extension. The VM export/import
feature can be used in a number of different ways:
- As a convenient backup facility for your VMs. An exported VM file can be used to recover an entire VM in the event of disaster.
- As a way of quickly copying a VM, for example, a special-purpose server configuration that you use many times. You simply configure the VM the way you want it, export it, and then import it to create copies of your original VM.
- As a simple method for moving a VM to another server.
Note It may not always be possible to run an imported VM that was exported from another server with a different CPU type. For example, a Windows VM created on a server with an Intel® VT Enabled CPU, then exported, may not run when imported to a server with an AMD-VTM CPU.
To export a VM:
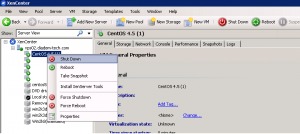
- If the VM you want to export is running, you must shut it down first. See the image below:
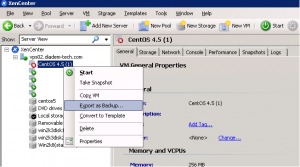
- In the Resources pane, select the VM, right-click, and then click Export as Backup on the shortcut menu. Alternatively, on the VM menu, click Export as Backup.
- Enter a name for the export file and specify the folder where you want it to be saved.
- To have the export file verified, select the Verify export on completion check box at the bottom of the dialog box. Be aware that verification may take some time.
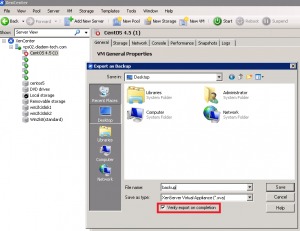
- Click Save to begin exporting the file.
- The export progress is displayed in the status bar at the bottom of the XenCenter window and on the Logs tab. To cancel an export in progress, click on the Logs tab, find the export in the list of events, and click the Cancel button.
Exporting a VM may take some time, depending on its size and the speed and bandwidth of the network connection between the server and XenCenter.
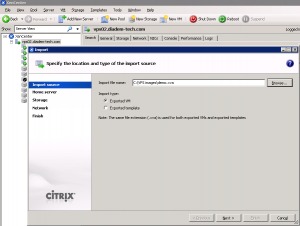
To import an external VM in XenCenter, you use the Import wizard: select a server or pool in the Resources pane, right-click, and then select Import VM on the shortcut menu, and follow the wizard steps.
- Import source. Enter the location of the exported VM in the Import file name box and ensure that the Exported VM option button is selected. Click Next to continue.
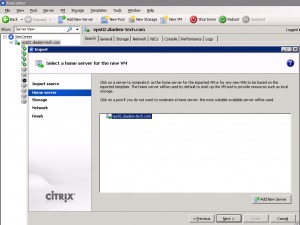
- Home server. Select a home server for the new VM, then click Next to continue.
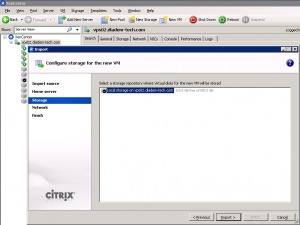
- Storage. Select a storage repository where virtual disks for the new VM will be stored, then click Import to begin the import process.
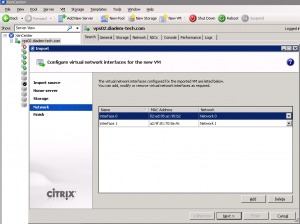
- Network. Configure the virtual network interfaces for the imported VM. The default network interfaces are listed on this page; you can add, modify, or delete virtual network interfaces as required. When you are happy with the new VM’s network configuration, click Next to move to the final wizard page.
- Finish. To have your new VM start up as soon as the import process has finished and the new VM is provisioned, ensure the Start VM after import check box is selected before you click Finish.
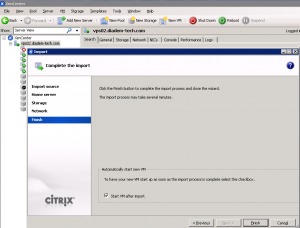
Click Finish to complete the import process and close the wizard.
The import progress is displayed in the status bar at the bottom of the XenCenter window and also on the Logs tab. The import process may take some time, depending on the size of the VM and the speed and bandwidth of the network connection between XenCenter and the server where you are installing the new VM.
Once the newly-imported VM is available, it appears in the Resources pane. This is in a nutshell, the simplest way to backup your VMs if you are the administrator of a Xenserver. There are advanced tools available like PHDVirtual, which automates the backup and transfer of your VMs to an external storage and though their pricing is a bit steep its well worth the price for the convenience and automation offered.